07 February 2023

Free and Easy Styling Ideas to Expand Your Wardrobe

Expand your wardrobe without buying anything. Try these free and easy styling tips to increase the options for the clothes you already have.

Have you ever stared at the clothes in your closet and felt you had nothing to wear? It happens to me, too. The problem isn't enough clothes to wear. It is usually clothes you don't like some aspect of. Maybe the length of the skirt is off. Maybe the shirt is longer than what you want. It's too warm to wear that long-sleeve shirt, even though it would be perfect.

With these styling ideas, however, you may find you can wear clothes you already have, but in a way that feels good and looks fresh.

Why Try These Ideas?

The most sustainable clothes are the ones already in your closet. Rather than buying more clothes (even from a thrift store), styling in a different way allows you to wear what you have, but in a different way so it feels like you have new choices. 

None of these make permanent changes to your clothes. You can do them, then remove them without causing damage.

These tips also do not require any sewing or making any purchases.

You may find you prefer the way the clothes work with these styling changes. Some of them can be made permanent with alterations, which will require sewing or taking it to a seamstress or tailor to do the alterations. 

Try these ways to style your clothes and see if they work for you


Styling Idea #1 - Roll It Up

1. Roll up the bottom of your jeans or trousers and cuff them. This lets you show off colorful socks, and you can wear flats instead of heels if they are long.
 
2. Roll up your sleeves. This can give a long-sleeve top 3/4 length sleeves, and 3/4 length sleeves can become elbow length or short. Play around with it and see what works.

A turquoise colored pullover top is shown with the sleeves rolled up above the elbow. The front is also knotted, with the knot tucked under. It is worn with a brown A-line skirt. that is just below the knee.
 
3. Roll the waistband to make your skirt shorter. How many times? As many as it takes to get the look you want. Below is a comparison before and after I did one of mine.

Woman wears a white top with a black cardigan over it. The cardigan is tied at the bottom. She also wears a black and white striped skirt.

Woman wears a white top with black cardigan over it. The cardigan is tied at the bottom. She wears a black and white striped skirt that has been shortened by rolling up the waistband.


This isn't a huge change, but it is enough for me to feel better about it. 

Styling Idea #2 - Tie It Up

1. Gather your shirt in the front (center or to one side) and wrap a rubber band around the end. Tuck this under so it doesn't show. You can also turn under the bottom of the shirt for a neater finish.

Turquoise colored pullover shirt is shown knotted in the front, with the knot tucked underneath and not showing. This is worn with a brown A-line skirt that is just below the knees and brown sandals.

 
2. For blouses, tie the ends in a knot in the front. This can also work with lightweight cardigans, as I did in the photo above of the black cardigan with the black and white striped skirt.

Woman wears a red shirt with a white blouse with strips on top. The blouse is tied together at the bottom. She also wears brown trousers and brown shoes.

3. You can also tie a knot on each side at the bottom in front for another look.

Gladys stands in front of a mirror taking a picture. The outfit she wears is a  blouse worn unbuttoned with sleeves rolled up and the ends of blouse knotted on each side. It is worn over a plain tee shirt and jeans.

Styling Idea #3 - Wear it Back to Front

1. This is a vintage Beeline top I found at a thrift store for 50 cents. I loved the pattern and the colors, but I never liked the way it looked when I wore it. Something was off.

Woman wears a brightly colored paisley top that has a turtleneck and is sleeveless. She is also wearing jeans and tan sandles.

The shirt zipped up the back, so I wondered what would happen if I wore it backward. I tried it and not only did it fit, but I also loved the way it looked. This is the way I wear it now.

Woman wears a colorful paisley shirt that is sleeveless and zips up the front. A carved belt is over the shirt. She also wears denim shorts and light brown sandals.

This won't work for everything, but try wearing a shirt or dress with the back in front and see what happens.

Your Turn

There are some tips to get you started. The next time you put on something that doesn't feel right, try some of these temporary alterations and see if they make a positive difference.

01 April 2022

Shopping Tip - Use A Tape Measure

Finding clothes that fit when shopping is a challenge. Here is an idea to make it easier.

No matter where you shop, finding clothes that fit is hard. Each brand has a different version of what each size is. And sizes change through the years. A vintage piece that is a size 12 will not fit like a current size 12.

If there are fitting rooms you can try things on, but that is tiring. Shopping garage and estate sales doesn't give you that option. When you are shopping online, the only way to try on the clothes is to purchase them and return if they don't work.

So here is a quick tip to help you better determine if something will fit.

Use a Tape Measure


Get a tape measure, take your measurements and write them down. Take these with you when you go shopping along with your tape measure. Before trying things on, measure the garment and see how close it is to your measurements. If it is close, and there is a place to try it on, do so. 

What measurements should you take? I'd begin with

  • chest
  • waist
  • hips
  • inseam
  • leg from waist to floor
  • arm from shoulder to wrist 

(How to Take Body Measurements - where to measure for each of these) 

As you shop you may find you have other measurements that would be helpful to have. Take those and add to your list.

A note about waist measurement. This is normally taken at your natural waist, but be aware that if the jeans/trousers/skirt has a mid- or low-rise, the waist measurement will not match your waist. 

This Is Not a Perfect Method

This is not foolproof. An item may match your measurements, but still not fit right. The cut of a garment will effect how things fit on your body, and with time and experimentation, you will learn things that work for your unique body. 

For example, I cannot wear skirts that have no waist; they just do not fit me right. It doesn't have to be a big waistband, but there needs to be one. 

When shopping online, whether new or resale, check your measurements with the listing. If a measurement you need is missing, message the seller and ask for it. 

I even use this technique for shoes. My foot is large and wide, and it if hard to find shoes that fit my foot. A couple of measurements help me better determine if things will fit or not.

I have an old tape measure that I keep in a small bag along with a notebook with my measurements and names and contact information of thrift and vintage stores. I pop that in my purse when I head out so I always have what I need.

13 March 2020

How To Crochet Around A Wire Hanger

How to Crochet Around a Wire Hanger with image of crocheted hanger.
I would rather reuse things rather than throw them out. With this in mind, I created this tutorial for crocheting yarn around wire hangers to make them non-slip and to add a bit of padding.

Tutorial includes:
*List of supplies
*Step-by-step instructions
*Photos

Available for purchase on Etsy and Gumroad.

Reviews
★★★★★
This was soooo helpful!! I was actually able to pick it up as I read along! Thank you for breaking this down well for a beginner!!!
Buyer on Etsy

11 March 2020

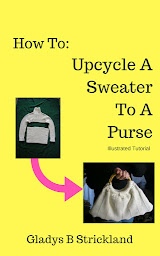
How To Upcycle A Sweater To A Purse


Upcycling at it's best! Turn a pullover sweater into a purse, giving new life to an old garment.

This sewing tutorial is a PDF you download and print off.

Included is a list of supplies, step-by-step instructions and color photo illustrations.

 Get your copy today!

Upcycle A Sweater To A Purse Sewing Tutorial PDF